Submitted by guitar-list on
Project:
Step number:
Instructions:
This project used 2-sided maching strategy. That means the piece of wood is fixed to the CNC machine, one side is machined then the wood is flipped over and the other side machined. The end result is a three dimensional object.
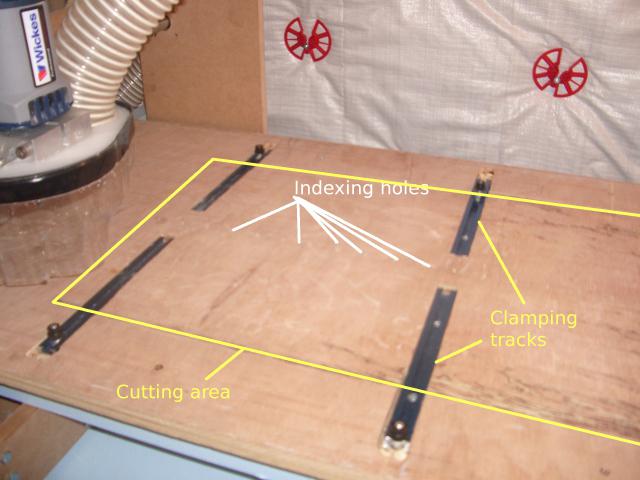
For 2 sided machining to work properly you need to align the wood exactly, so that when it is flipped over the centre lines match up. To do this I used 6mm indexing holes. First I machined two holes in the spoil board of the CNC machine. The spoil board is the sacrificial wooden bed of the machine. You then drill corresponding holes in the workpiece and then put dowels in the holes to line the workpiece up.
In fact I drilled more than two holes - as you can see in the picture - I drilled a line of holes at 10cm intervals down the centre of the spoil board. These extra holes allow me to used the same indexing fixture for different sized objects. I also put some mini Kreg Track into the spoil board for clamping the workpieces.
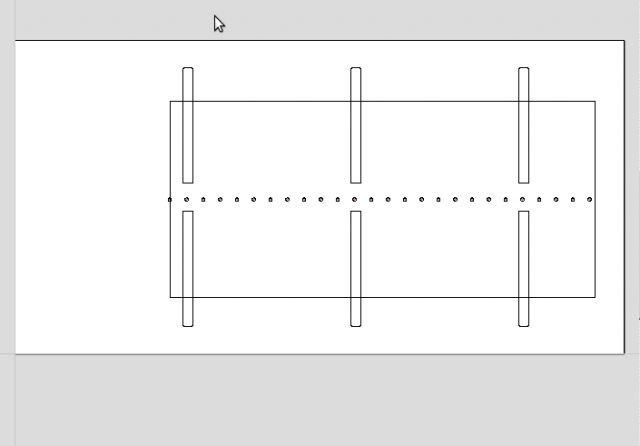
The first picture shows a plan view of the spoil board. The inner rectangle is the actual cutting area of the machine, the central line of holes are indexing holes, and the thin rectangles are where the clamping track goes.
I machined the spoilboard using Vectric Cut2D, you can see that the end of the clamping track is out side the cutting area -so I had to route that part by hand.
It is important that you can home your machine accurately in relation to the spoil board ( I use the machine's home switches), or index the machine in relation to the spoil board, otherwise this strategy will not work.


